Mô-đun 3 — Đăng ký thiết bị (Cloudflare One Client / WARP)
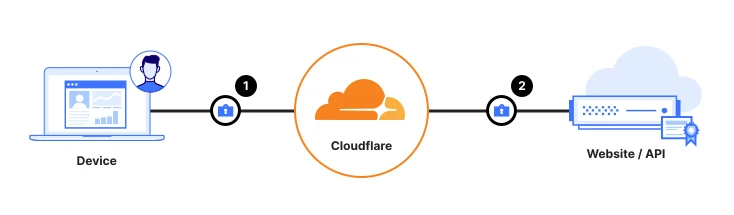
Mục tiêu: Cài Cloudflare One Client (ứng dụng WARP) trên thiết bị để lưu lượng của chúng kết nối an toàn tới Cloudflare, và để Cloudflare kiểm tra mỗi thiết bị khỏe mạnh trước khi cấp quyền truy cập.
|
|
| 👤 Ai làm việc này |
Đội Endpoint / Desktop |
| ⏱️ Thời gian |
~60 phút (pilot); rollout MDM tùy thuộc |
| 🎯 Kết thúc bạn sẽ có |
Một thiết bị pilot hiện Connected, nằm trong bảng điều khiển, với một posture check đạt |
| ✋ Trước khi bắt đầu |
Đã xong Mô-đun 2 (IdP đã kết nối + đã test), và một laptop thử nghiệm bạn kiểm soát |
📖 Đặt tên: Ứng dụng chính thức là Cloudflare One Client. Bạn vẫn thấy "WARP" trong menu và chính ứng dụng — chúng là cùng một thứ.
Chúng ta sẽ làm theo thứ tự: (A) quyết định ai được đăng ký → (B) đặt cách thiết bị hành xử → (C) cài trên một thiết bị pilot → (D) phân phối chứng chỉ → (E) bật kiểm tra sức khỏe → (F) triển khai quy mô lớn bằng MDM.
Phần A — Quyết định ai được đăng ký (làm bước này trước)
Nếu bỏ qua bước này, ứng dụng sẽ từ chối kết nối với "you are not allowed to enroll."
- 👉 Zero Trust → Settings → WARP Client.
- 👉 Tìm Device enrollment permissions → nhấp Manage.
- 👉 Nhấp Add a rule.
- ⌨️ Điền:
| Trường |
Giá trị |
| Rule name |
Company employees |
| Rule action |
Allow |
| Selector |
Emails ending in |
| Value |
@yourcompany.com |
- 👉 Dưới login methods / identity providers, chọn IdP bạn đã kết nối ở Mô-đun 2.
- 👉 Nhấp Save.
✅ Điểm kiểm tra: Một rule xuất hiện cho phép tên miền email công ty của bạn đăng ký, dùng IdP của bạn.
💡 Mẹo: Với máy chủ hoặc đội thiết bị tự động lớn, sau này bạn có thể tạo rule Service Auth + service token để thiết bị đăng ký im lặng, không cần đăng nhập. Với pilot, rule Allow ở trên là đủ.
Phần B — Đặt cách thiết bị hành xử (device profile)
-
👉 Trong Settings → WARP Client, cuộn tới Device settings (hoặc Profile settings).
-
👉 Nhấp hồ sơ Default → Configure.
-
👉 Đặt các mục sau cho laptop công ty được quản lý:
| Thiết lập |
Đặt thành |
Vì sao |
| Service mode |
Gateway with WARP |
Bảo vệ đầy đủ (lọc web + DNS + truy cập nội bộ) |
| Switch Locked |
On |
Ngăn người dùng tắt ứng dụng |
| Auto connect |
1 phút |
Tự kết nối lại sau khi mất kết nối ngắn |
| Captive portal detection |
On |
Cho phép người dùng đăng nhập Wi-Fi khách sạn/sân bay |
-
👉 Nhấp Save profile.
Split Tunnel (lưu lượng nào đi qua Cloudflare)
- 👉 Vẫn trong hồ sơ, tìm Split Tunnels → nhấp Manage.
- Chọn chế độ:
- Laptop thuộc công ty → để ở chế độ Exclude (mặc định). Mọi thứ đi qua Cloudflare trừ một danh sách loại trừ có sẵn nhỏ.
- Thiết bị cá nhân / BYOD → chuyển sang chế độ Include và chỉ liệt kê ứng dụng/mạng công ty, để lưu lượng cá nhân của nhân viên vẫn riêng tư.
⚠️ Lưu ý: Đừng chạy thiết bị cá nhân ở chế độ Exclude đầy đủ — nó đưa duyệt web cá nhân của người dùng qua công ty, gây lo ngại về quyền riêng tư. Dùng chế độ Include cho BYOD.
✅ Điểm kiểm tra: Hồ sơ Default của bạn hiện Gateway with WARP và chế độ split-tunnel phù hợp với loại thiết bị.
💡 Cần thiết lập khác nhau cho các loại thiết bị khác nhau (BYOD vs. được quản lý vs. máy chủ vs. nhà thầu)? Đó là việc của device profiles. Hướng dẫn đầy đủ — chế độ client, match rules/selectors, thứ tự ưu tiên, split tunnel theo hồ sơ, và local domain fallback — nằm ở trang đi kèm: Mô-đun 3b — Cấu hình Device Profiles.
Phần C — Cài trên thiết bị pilot (thủ công)
Chúng ta sẽ cài trên một laptop trước và xác nhận hoạt động trước mọi triển khai hàng loạt.
Bước C1 — Tải client
- 👉 Trên laptop thử nghiệm, mở
https://one.one.one.one/ và chọn nền tảng của bạn, hoặc tải trực tiếp:
- Windows: tải trình cài Cloudflare WARP (
.msi / .exe)
- macOS: tải trình cài Cloudflare WARP (
.pkg)
- Linux / iOS / Android: làm theo hướng dẫn nền tảng trên trang tải
Bước C2 — Cài đặt
- 👉 Chạy trình cài và chấp nhận các lời nhắc (trên macOS bạn sẽ Allow system extension và cấu hình VPN; trên Windows, chấp nhận lời nhắc UAC).
- 📺 Bạn sẽ thấy: Một logo Cloudflare nhỏ xuất hiện trên thanh menu (macOS) hoặc khay hệ thống (Windows).
Bước C3 — Kết nối với tổ chức của bạn (không phải chế độ consumer)
Đây là bước gắn ứng dụng với tổ chức Zero Trust của bạn.
- 👉 Nhấp biểu tượng Cloudflare WARP → biểu tượng bánh răng/cog ⚙️ → Preferences → Account.
- 👉 Nhấp Login with Cloudflare Zero Trust.
- ⌨️ Khi được hỏi team name, chỉ nhập phần tên (ví dụ
acme, không phải URL đầy đủ).
- 👉 Nhấp Continue.
- 📺 Trình duyệt mở đăng nhập công ty (IdP từ Mô-đun 2). Đăng nhập.
- ✅ Bạn sẽ thấy trang "You have successfully authenticated". Quay lại ứng dụng.
- 👉 Đảm bảo công tắc chính của ứng dụng đang On / Connected.
✅ Điểm kiểm tra — xác nhận thực sự được bảo vệ:
- 👉 Nhấp biểu tượng WARP — nó phải ghi Connected.
- 👉 Trong trình duyệt trên laptop đó, truy cập
https://www.cloudflare.com/cdn-cgi/trace/
- 📺 Trong văn bản hiện ra, tìm:
- 👉 Bây giờ kiểm tra bảng điều khiển: Zero Trust → My Team → Devices. Thiết bị thử nghiệm xuất hiện trong danh sách. 🎉
⚠️ Nếu hiện "not allowed to enroll": quay lại Phần A — tên miền email chưa được rule đăng ký bao phủ, hoặc chọn sai IdP.
Phần D — Phân phối chứng chỉ Cloudflare
Bước này bắt buộc trước khi bạn bật HTTPS inspection, DLP, hoặc quét prompt AI ở các mô-đun sau. Nếu thiếu, website bảo mật sẽ báo lỗi chứng chỉ.
- 👉 Zero Trust → Settings → Resources (menu cũ: Settings → Devices → Certificate).
- 👉 Tìm Cloudflare certificate và Download nó.
- Cài vào kho chứng chỉ tin cậy của thiết bị:
- Pilot (thủ công): nhấp đúp chứng chỉ và thêm vào kho hệ thống/keychain "Trusted Root".
- Quy mô lớn: đẩy qua MDM (nêu ở Phần F).
✅ Điểm kiểm tra: Chứng chỉ Cloudflare đã được cài và tin cậy trên thiết bị pilot.
⚠️ Lưu ý: Đừng bật giải mã TLS/HTTPS (Mô-đun 5) cho đến khi chứng chỉ này có trên thiết bị, nếu không website HTTPS sẽ hỏng.
Phần E — Bật kiểm tra sức khỏe thiết bị (posture)
Hãy thêm một kiểm tra đơn giản để bạn có thể yêu cầu thiết bị khỏe mạnh ở các mô-đun sau.
- 👉 Zero Trust → Settings → WARP Client → Device posture (hoặc Reusable components → Posture checks).
- 👉 Nhấp Add → chọn một kiểm tra client đơn giản, ví dụ Disk encryption.
- ⌨️ Đặt tên
Disk encrypted, chọn (các) nền tảng, và lưu.
📺 Bạn sẽ thấy: Posture check mới được liệt kê, đang đánh giá các thiết bị đã đăng ký.
✅ Điểm kiểm tra: Thiết bị pilot báo compliant cho kiểm tra mã hóa đĩa (giả sử đĩa đã được mã hóa).
💡 Mẹo: Với kiểm tra phiên bản OS, yêu cầu phiên bản mới nhất bạn đã kiểm tra, không phải bản mới nhất tuyệt đối — nếu không một bản OS vừa ra có thể khóa mọi người ngay ngày phát hành. Nếu bạn dùng CrowdStrike, SentinelOne, hoặc Intune, bạn cũng có thể thêm chúng làm nguồn posture tại đây (Enterprise). Lưu ý: posture Tanium hoạt động với Access nhưng không với Gateway.
🛡️ Posture là một chủ đề lớn. Bộ công cụ đầy đủ — mọi kiểm tra có sẵn, tích hợp EDR/MDM bên thứ ba, dùng posture trong chính sách Access & Gateway, và đánh giá lại liên tục — xem Mô-đun 3c — Device Posture Checks.
Phần F — Triển khai cho mọi người (MDM)
Khi thiết bị pilot hoạt động, triển khai cho đội thiết bị im lặng bằng MDM (Intune, Jamf, Kandji, Workspace ONE, SCCM…). Bạn đẩy cùng ứng dụng cộng một cấu hình nhỏ để nó tự đăng ký, không cần bước người dùng.
Các thiết lập chính cần đẩy
| Thiết lập |
Giá trị |
Mục đích |
organization |
team name của bạn |
Gắn ứng dụng với tổ chức (bắt buộc) |
service_mode |
warp |
Gateway with WARP |
onboarding |
false |
Ẩn màn hình chào (im lặng) |
auto_connect |
1 |
Kết nối ngay |
switch_locked |
true |
Người dùng không tắt được |
support_url |
liên kết hỗ trợ IT của bạn |
Hiện trong ứng dụng |
Để đăng ký hoàn toàn im lặng (không hỏi đăng nhập), cũng đẩy một service token:
- 👉 Tạo rule đăng ký Service Auth (Phần A → action Service Auth).
- 👉 Zero Trust → Access → Service Auth → Service Tokens → Create → sao chép Client ID và Client Secret.
- Đẩy chúng thành
auth_client_id và auth_client_secret trong cấu hình MDM.
⚠️ Lưu ý: Thiết lập MDM cục bộ ghi đè thiết lập bảng điều khiển. Và service token cần rule đăng ký Service Auth — rule Allow thường không dùng được cho đăng ký bằng token.
Ví dụ hồ sơ cấu hình macOS (com.cloudflare.warp):
<dict>
  <key>organization</key>       <string>acme</string>
  <key>service_mode</key>       <string>warp</string>
  <key>onboarding</key>         <false/>
  <key>auto_connect</key>       <integer>1</integer>
  <key>switch_locked</key>      <true/>
  <key>support_url</key>        <string>https://help.acme.com</string>
</dict>
Đẩy Cloudflare certificate (Phần D) qua cùng hồ sơ MDM.
✅ Điểm kiểm tra: Một thiết bị thứ hai, đăng ký qua MDM, xuất hiện dưới My Team → Devices là Connected mà không cần đăng nhập thủ công.
✅ Hoàn thành Mô-đun 3!
Bây giờ bạn có:
- ✅ Một rule đăng ký kiểm soát ai được tham gia
- ✅ Một device profile (Gateway with WARP + split tunnel)
- ✅ Một thiết bị pilot Connected và nằm trong bảng điều khiển
- ✅ Chứng chỉ Cloudflare đã được phân phối
- ✅ Một device posture check hoạt động
- ✅ Một kế hoạch rollout MDM cho phần còn lại của đội thiết bị
Khắc phục nhanh
| Vấn đề |
Cách khắc phục |
| "You are not allowed to enroll" |
Thêm/sửa rule đăng ký (Phần A); xác nhận tên miền email + IdP |
| Ứng dụng kẹt "Connecting" |
Kiểm tra thiết bị ra được internet; thử tắt/bật; kiểm tra tường lửa không chặn WARP |
gateway=on không hiện trong trace |
Service mode không phải Gateway with WARP, hoặc đang ở chế độ chỉ DNS — sửa hồ sơ (Phần B) |
| Website HTTPS hiện cảnh báo chứng chỉ |
Chứng chỉ Cloudflare chưa được tin cậy — cài nó (Phần D) trước mọi HTTPS inspection |
| Thiết bị cá nhân đưa lưu lượng cá nhân đi qua |
Chuyển hồ sơ đó sang chế độ split-tunnel Include (Phần B) |
Bạn sẽ xuất bản ứng dụng nội bộ đầu tiên và thay thế truy cập VPN tới nó.
Module 3 — Device Enrollment (Cloudflare One Client / WARP)
Goal: Install the Cloudflare One Client (the WARP app) on your devices so their traffic can be securely connected to Cloudflare, and so Cloudflare can check each device is healthy before granting access.
|
|
| 👤 Who does this |
Endpoint / Desktop team |
| ⏱️ Time |
~60 minutes (pilot); MDM rollout varies |
| 🎯 You'll finish with |
A pilot device showing Connected, listed in your dashboard, with a posture check passing |
| ✋ Before you begin |
Module 2 done (IdP connected + tested), and one test laptop you control |
📖 Naming: The app is officially the Cloudflare One Client. You'll still see "WARP" in menus and the app itself — they're the same thing.
We'll go in this order: (A) decide who can enroll → (B) set how devices behave → (C) install on a pilot device → (D) distribute the certificate → (E) turn on health checks → (F) roll out at scale with MDM.
Part A — Decide who's allowed to enroll (do this first)
If you skip this, the app will refuse to connect with "you are not allowed to enroll."
- 👉 Zero Trust → Settings → WARP Client.
- 👉 Find Device enrollment permissions → click Manage.
- 👉 Click Add a rule.
- ⌨️ Fill in:
| Field |
Value |
| Rule name |
Company employees |
| Rule action |
Allow |
| Selector |
Emails ending in |
| Value |
@yourcompany.com |
- 👉 Under login methods / identity providers, select the IdP you connected in Module 2.
- 👉 Click Save.
✅ Checkpoint: A rule appears that allows your company's email domain to enroll, using your IdP.
💡 Tip: For servers or large automated fleets, you can later create a Service Auth rule + service token so devices enroll silently with no login. For your pilot, the Allow rule above is all you need.
Part B — Set how devices behave (device profile)
-
👉 In Settings → WARP Client, scroll to Device settings (or Profile settings).
-
👉 Click the Default profile → Configure.
-
👉 Set these for managed company laptops:
| Setting |
Set to |
Why |
| Service mode |
Gateway with WARP |
Full protection (web + DNS filtering + private access) |
| Switch Locked |
On |
Stops users turning the app off |
| Auto connect |
1 minute |
Reconnects automatically after brief drops |
| Captive portal detection |
On |
Lets users sign in to hotel/airport Wi-Fi |
-
👉 Click Save profile.
Split Tunnel (what traffic goes through Cloudflare)
- 👉 Still in the profile, find Split Tunnels → click Manage.
- Choose your mode:
- Company-owned laptops → leave it on Exclude mode (the default). Everything goes through Cloudflare except a small built-in exclusion list.
- Personal / BYOD devices → switch to Include mode and list only your company apps/networks, so employees' personal traffic stays private.
⚠️ Watch out: Don't run personal devices in full Exclude mode — it routes the user's personal browsing through your company, which raises privacy concerns. Use Include mode for BYOD.
✅ Checkpoint: Your Default profile shows Gateway with WARP and a split-tunnel mode appropriate for your device type.
💡 Need different settings for different devices (BYOD vs. managed vs. servers vs. contractors)? That's what device profiles are for. The full walkthrough — client modes, match rules/selectors, order of precedence, per-profile split tunnels, and local domain fallback — is in the companion page: Module 3b — Device Profiles Configuration.
Part C — Install on your pilot device (manual)
We'll install on one laptop first and confirm it works before any mass deployment.
Step C1 — Download the client
- 👉 On the test laptop, open
https://one.one.one.one/ and choose your platform, or download directly:
- Windows: download the Cloudflare WARP installer (
.msi / .exe)
- macOS: download the Cloudflare WARP installer (
.pkg)
- Linux / iOS / Android: follow the platform instructions on the download page
Step C2 — Install it
- 👉 Run the installer and accept the prompts (on macOS you'll Allow a system extension and VPN configuration; on Windows, accept the UAC prompt).
- 📺 What you'll see: A small Cloudflare logo appears in your menu bar (macOS) or system tray (Windows).
Step C3 — Connect it to your organization (not consumer mode)
This is the step that links the app to your Zero Trust org.
- 👉 Click the Cloudflare WARP icon → the gear/cog ⚙️ icon → Preferences → Account.
- 👉 Click Login with Cloudflare Zero Trust.
- ⌨️ When prompted for your team name, enter just the name part (e.g.
acme, not the full URL).
- 👉 Click Continue.
- 📺 Your browser opens your company login (the IdP from Module 2). Sign in.
- ✅ You'll see a "You have successfully authenticated" page. Return to the app.
- 👉 Make sure the app's main toggle is switched On / Connected.
✅ Checkpoint — confirm it's really protected:
- 👉 Click the WARP icon — it should say Connected.
- 👉 In a browser on that laptop, visit
https://www.cloudflare.com/cdn-cgi/trace/
- 📺 In the text shown, look for:
- 👉 Now check the dashboard: Zero Trust → My Team → Devices. Your test device appears in the list. 🎉
⚠️ If it says "not allowed to enroll": revisit Part A — your email domain isn't covered by an enrollment rule, or the wrong IdP is selected.
Part D — Distribute the Cloudflare certificate
This is required before you turn on HTTPS inspection, DLP, or AI prompt scanning in later modules. Without it, secure websites will show certificate errors.
- 👉 Zero Trust → Settings → Resources (older menus: Settings → Devices → Certificate).
- 👉 Find the Cloudflare certificate and Download it.
- Install it into the device's trusted certificate store:
- Pilot (manual): double-click the certificate and add it to the system/keychain "Trusted Root" store.
- At scale: push it through your MDM (covered in Part F).
✅ Checkpoint: The Cloudflare certificate is installed and trusted on your pilot device.
⚠️ Watch out: Do not enable TLS/HTTPS decryption (Module 5) until this certificate is on the device, or HTTPS websites will break.
Part E — Turn on a device health check (posture)
Let's add one simple check so you can require healthy devices in later modules.
- 👉 Zero Trust → Settings → WARP Client → Device posture (or Reusable components → Posture checks).
- 👉 Click Add → choose a simple client check, e.g. Disk encryption.
- ⌨️ Name it
Disk encrypted, choose the platform(s), and save.
📺 What you'll see: The new posture check listed, evaluating your enrolled devices.
✅ Checkpoint: Your pilot device reports compliant for the disk-encryption check (assuming its disk is encrypted).
💡 Tip: For OS-version checks, require the latest version you've already tested, not the absolute newest — otherwise a brand-new OS release could lock everyone out the day it ships. If you use CrowdStrike, SentinelOne, or Intune, you can add those as posture sources here too (Enterprise). Note: Tanium posture works for Access but not Gateway.
🛡️ Posture is a big topic. For the full toolkit — every built-in check, third-party EDR/MDM integrations, using posture in Access & Gateway policies, and continuous re-evaluation — see Module 3c — Device Posture Checks.
Part F — Roll out to everyone (MDM)
Once your pilot device works, deploy to the fleet silently using your MDM (Intune, Jamf, Kandji, Workspace ONE, SCCM…). You push the same app plus a small config so it self-enrolls with no user steps.
Key settings to push
| Setting |
Value |
Purpose |
organization |
your team name |
Links the app to your org (required) |
service_mode |
warp |
Gateway with WARP |
onboarding |
false |
Hides the welcome screens (silent) |
auto_connect |
1 |
Connects immediately |
switch_locked |
true |
Users can't disable it |
support_url |
your IT help link |
Shown in the app |
For fully silent enrollment (no login prompt), also push a service token:
- 👉 Create a Service Auth enrollment rule (Part A → action Service Auth).
- 👉 Zero Trust → Access → Service Auth → Service Tokens → Create → copy the Client ID and Client Secret.
- Push them as
auth_client_id and auth_client_secret in your MDM config.
⚠️ Watch out: Local MDM settings override dashboard settings. And service tokens require a Service Auth enrollment rule — a plain Allow rule won't work for token enrollment.
Example macOS configuration profile (com.cloudflare.warp):
<dict>
  <key>organization</key>       <string>acme</string>
  <key>service_mode</key>       <string>warp</string>
  <key>onboarding</key>         <false/>
  <key>auto_connect</key>       <integer>1</integer>
  <key>switch_locked</key>      <true/>
  <key>support_url</key>        <string>https://help.acme.com</string>
</dict>
Push the Cloudflare certificate (Part D) through the same MDM profile.
✅ Checkpoint: A second device, enrolled via MDM, appears under My Team → Devices as Connected with no manual login.
✅ Module 3 complete!
You now have:
- ✅ An enrollment rule controlling who can join
- ✅ A device profile (Gateway with WARP + split tunnel)
- ✅ A pilot device Connected and listed in the dashboard
- ✅ The Cloudflare certificate distributed
- ✅ A working device posture check
- ✅ An MDM rollout plan for the rest of the fleet
Quick troubleshooting
| Problem |
Fix |
| "You are not allowed to enroll" |
Add/repair the enrollment rule (Part A); confirm the email domain + IdP |
| App stuck "Connecting" |
Check the device can reach the internet; try toggling off/on; check a firewall isn't blocking WARP |
gateway=on not showing in the trace |
Service mode isn't Gateway with WARP, or a DNS-only mode is set — fix the profile (Part B) |
| HTTPS sites show certificate warnings |
The Cloudflare certificate isn't trusted yet — install it (Part D) before any HTTPS inspection |
| Personal device routes personal traffic |
Switch that profile to Include split-tunnel mode (Part B) |
You'll publish your first private application and replace VPN access to it.
Nguồn cộng đồng — không phải tài liệu chính thức của Cloudflare: https://zerotrust.cfsase.workers.dev
Community source — not an official Cloudflare publication: https://zerotrust.cfsase.workers.dev